Hi guys, today my sharing is how to build an HA system with Amazon Echo, Google Home, HA Bridge and Raspberry Pi 3
Brief introduction
HA Bridge emulates Phillips Hue so that Google Home and Amazon Echo can be recognized any devices that are not yet supported by Google Home and Amazon Echo.
Google Home and Amazon Echo used as voice assistant to control devices created in HA Bridge and Home Assistant.
This sharing consists of 5 sections.
- Install HA Bridge
- Adding Vera/Vera Edge to HA Bridge
- Add customize device/scene
- Voice Assistant with Amazon Echo
Voice Assistant with Google Home(No longer supported due to Google change the pairing method)
Section 1 Install HA Bridge.
- Before start, make sure to update Raspberry Pi to latest
$ sudo su
 # apt-get update
 # apt-get upgrade -y
- On your Raspberry Pi, navigate to /home/pi
# cd /home/pi
- Make and habridge folder
# mkdir habridge
- Change your folder and download ha-bridge jar files
# cd habridge
 # wget https://github.com/bwssytems/ha-bridge/releases/download/v5.2.1/ha-bridge-5.2.1.jar
- Create the systemd service file
# nano habridge.service
- Copy and paste the following
[Unit]
Description=HA Bridge
Wants=network.target
After=network.target
[Service]
Type=simple
ExecStart=/usr/bin/java -jar -Dconfig.file=/home/pi/habridge/data/habridge.config /home/pi/habridge/ha-bridge-5.2.1.jar
[Install]
WantedBy=multi-user.target
- Save the file by hit CTRL-X, then hit Y and ENTER key.
- Install Java 8 SDK
# apt-get update && sudo apt-get install oracle-java8-jdk
# update-alternatives --config java
and select the JDK 8 version (/usr/lib/jvm/jdk-8-oracle-arm32-vfp-hflt/jre/bin/java).
Then run below to check Java 8 SDK is successfully install.# java -version
java version “1.8.0_65”
Java(TM) SE Runtime Environment (build 1.8.0_65-b17)
Java HotSpot(TM) Client VM (build 25.65-b01, mixed mode) - Following by enabling the systemd service so that service will auto start every time Raspberry Pi reboot.
# sudo systemctl enable /home/pi/habridge/habridge.service
- The service is now enabled, to run it just type:
# systemctl start habridge
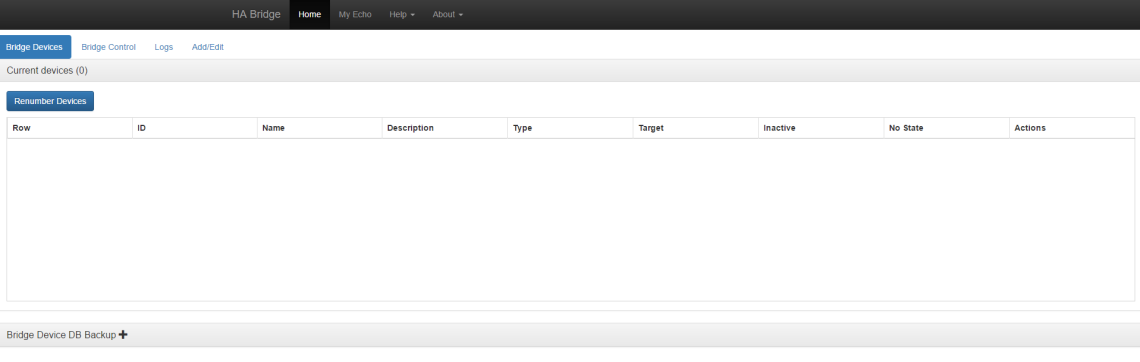
- The default port for HA Bridge is 80, you can now access from your browser :
http://you-habridge-ip
Here you go your first HA Bridge
Special Thanks
HA Bridge contribute by bwssytems (Github), and guide by BarryHampants
Section 2 Adding Vera/Vera Edge/Fibaro HCL and Fibaro HC2 into HA Bridge
- If you have Vera/Vera Edge/HCL or HC2, you can now add them into HA Bridge so that Google Home and Amazon Echo can control them.
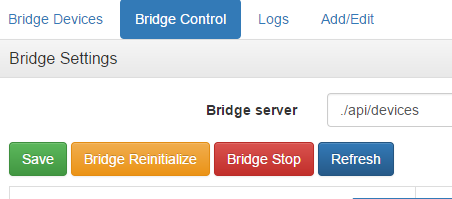
- Click “Bridge Control” from HA Bridge tab
- Supply Name(can be any name), IP of your Vera and click “Add” button to add. For Fibaro HC2 or HCL, you just need to supply, IP, username, and password click “Add” button when done.

- Click “Save” button and the system will automatically reload the settings
- Click “Fibaro Devices”, you can see the list of available devices. Click “Build item” on any device you wish to add into voice assistant
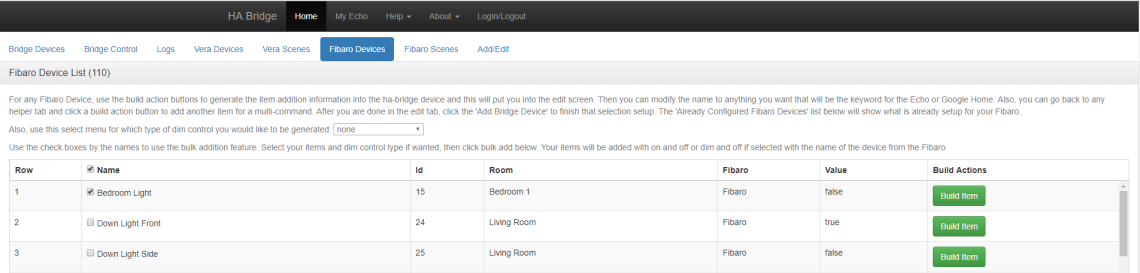
- Click “Add Bridge Device” to confirm add
- You can now try turn on/off the device or scene you just add by clicking the “Test ON” or “Test Off” button

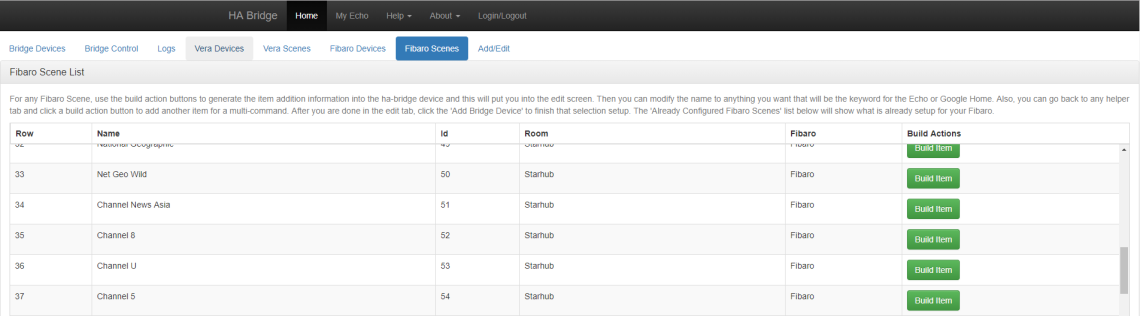
- You can add Fibaro Scene by click on “Fibaro Scenes” tab, following by click on scene you like to add into voice control.
Section 3 Add customize device/scene
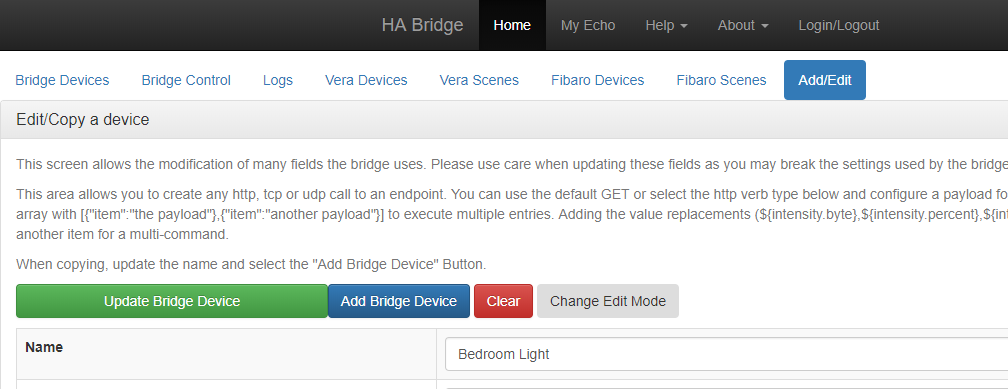
Let say I have other device can be trigger using HTTP request, I can create from “Add/Edit” tab
- Click “Add/Edit” tab, supply the following information, the following is example how to trigger device on/off from Fibaro HC2 using HTTP
Name: Kitchen Light
On Items:
Type-> HTTP Device
Target Item: http://{username}:{password}@{Fibaro_IP}/api/callAction?deviceID={device_ID}&name=turnOn
P/S: Once done click “Add” to confirm add “On” action
Off Items:
Type-> HTTP Device
Target Item: http://{username}:{password}@{Fibaro_IP}/api/callAction?deviceID={device_ID}&name=turnOff
P/S: Once done click “Add” to confirm add “Off” action - Finally click “Add Bridge Device” to confirm add device, below is the final result. I can now trigger Kitchen light On/Off.

Section 4 Voice Assistant with Amazon Echo
- Discover your newly added device by speak to Amazon Echo
“Alexa, discover device”, - To view your newly discovery devices/Scenes, login to Echo by click “My Echo” on top of the menu
- Click “Smart Home”->”Devices”, you shall see the scene/device added into Echo.
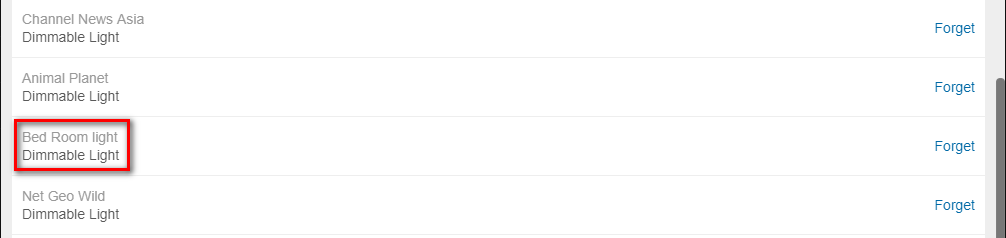
- Command Alexa by say “Alexa, turn on Bed Room Light”

You are welcome John, glad my sharing helped. ^^
LikeLike
I just Googled my question and found your answer was posted yesterday. It’s exactly what I was looking for. Thank you for your presentation.
LikeLike
Most welcome John.
LikeLike
I ran into the first problem. With the latest June 2017 Jessie, oracle-java8-jdk is already installed. However, “update-alternatives –config java” fails with the error message “update-alternatives: error: unknown argument `–config'”
Since I didn’t get that far, I hope that “select the JDK 8 version (/usr/lib/jvm/jdk-8-oracle-arm32-vfp-hflt/jre/bin/java)” becomes clear when it appears. Right now, “java-version” gives all the expected results, as shown in your instructions. So, maybe Java 8 SDK is already installed correctly.
Thinking that Java 8 SDK might be installed correctly, I tried continuing, but the next problem is trying to run “systemctl start habridge.” I get the error “Failed to start habridge.service: Unit habridge.service failed to load: Invalid argument. See system logs and ‘systemctl status habridge.service’ for details.” I tried rebooting, but again it failed, trying it both as sudo and user.
Entering “systemctl status habridge.service” gives:
habridge.service – HA Bridge
Loaded: error (Reason: Invalid argument)
Active: inactive (dead)
And, of course, “dead” likely explains why http://you-habridge-ip can’t be found, unless I am so brain dead to not realize you mean the Rasperry Pi’s URL and port 80, (192.168.1.14:80) which also fails, due to being dead.
I used cut and paste for all the commands, so it’s not a matter of my usual misspellings.
Also, it is really OK to install everything using “sudo su?” I know that’s easier than typing sudo so much. But I am merely a user of Linux, and not an expert, and I’ve seen warnings in the past saying installing some programs, directories, files & folders as SU can cause problems when you try to use them as a regular user.
Thanks for any assistance you might be able to provide.
LikeLike
Hi John, have you run this command ?
sudo systemctl enable /home/pi/habridge/habridge.service
is okay not do sudo su, what you need to do is every command you run, in front type sudo. let me know if this help
LikeLike
I was able to install and start HA Bridge. But, as seems to always be the case, no one set of instructions gives a working version. Bits of each one I find are necessary to finally get it working.
I wondered about a referenced data file, which didn’t exist, and BarryHampants says we should create one. “sudo mkdir data” in the folder habridge. This is where the file habridge.config gets written to.
The bwssystems GitHub page is where I found most of the needed instructions.
It says to install ha-bridge-4.5.6 and we have already installed 4.3.1. Rather than installing another version (which I will probably do later anyhow), I stayed with 4.3.1, just to see if I could get anything working.
I followed all the instructions under “Automation on Linux Systems” other than downloading 4.5.6
In the “Basic script setup to run the bridge on a pi” section, I followed those instructions, other than changing 4.5.6 to 4.3.1, and everything worked. My HA-Bridge web page popped right up.
————
Minor: Your instructions include “sudo systemctl enable /home/pi/habridge/habridge.service” but, since we are already in su mode, sudo is not needed.
Minor: There is a typo in your instructions. “update-alternatives -config java” should be “update-alternatives –config java”. Barry also mentions that Java has to be installed only if it doesn’t already exist, and it exists on the latest June 2017 Jessie.
There is another error in your instructions. “http://you-habridge-ip” should be “http://[your-ip-address]:80” Also :80 is not needed, as that is the default port for web pages. The browsers I use just strip it out, and testing showed it isn’t necessary.
Thanks for your help so far, and now I will go through the rest of the instructions.
As the professor in my first Electrical Engineering class said, “If it doesn’t work the first time, you are indeed fortunate. That’s because now you will learn more about it than you could any other way.”
LikeLike
I see the system changed a typo. “dash-config java” should be “dash-dash-config java.”
LikeLike
so
sudo update-alternatives –config java
is correct right?
LikeLike
Your web site turns double-dashes into a long single dash. So it has to be [dash][dash][config.java]. Copying from your web site just gives [dash][config.java]. Your web page auto-formats when, in this case, you don’t want it to.
LikeLike
Possibly your web site allows certain blocks of text to be formatted as computer code, rather than typeset text.
LikeLike
It would be easier to understand if you were in the printing industry. As it is, when copying from a text editor to your web site, your web site formats the code as a typesetter would, meaning a double dash gets automatically turned into a long single dash. Unfortunately, copying from a formatted web page text means the single dash on your web site stays as a single dash when copied to a text editor, or IDE.
LikeLike
Thanks John for pointing out this, I’ve fixed this issue
LikeLike
Section 5 Voice Assistant with Google Home
does not work anymore
in the app as soon as i select hue it takes me to their webpage
LikeLike
yes, so what you need to do is click the “Pair” on the website’s lower right corner to start pairing, in this step no action need on Philips physical Hue bridge.
LikeLike
Hi Khengsoon, I’m inspired to do the same to retrofit the switches in my house after seeing your blog post.
May I ask if there have been any updates to your home automation since last year? Right now my Alexa is just sitting pretty in the corner…
LikeLike
Hi Andrew, I’ve actively add and modify my home automation features. What you like to see or imagine with your end result?
LikeLike